Autocropping Film Scans
Manual cropping of film scans is a pain, why and how I built an automated solution that actually works.
I first encountered the cropping problem last year, when building a small non profit DIY film lab with other photographers. The goal was initially to use the shared space to support our own practices, but we quickly ended up processing other people's rolls as well, and had to figure out ways of doing it at some scale with limited resources. I handled most of the buildout, from setting ourselves up to use cheap minilab chemistries instead of hobbyist kits, to building a dedicated camera scanning rig.
The volume of film we handled led us to realise cropping was a big bottleneck. We either had to make do with the pretty unreliable autocrop in the inversion software we'd use, or try and mechanically key the frames, requiring a safety margin and thus eating into the image.
Solutions exist, and the industry already deals with this via mechanical indexing, safety margins, and accepting the time lost to manual trimming for weird formats. Dedicated hardware, with film transport and scanning integrated into a single machine, or built from discrete off the shelf components also works, but mechanical indexing will always require some margin, as observing carefully where the film gate sits throughout any roll of 35mm film will show. The variations are minor, a couple of millimetres at most, but on a 24mm high image, these misalignments end up eating a few percent of the image area.
The lost time, the approximate crops we'd have to correct painstakingly by hand, and the fact I believed the problem not to be that complicated led me to seek a solution to automate the cropping. Most of the difficulty was figuring out the nature of the data and what exactly was causing existing automated cropping to fail. Using a few reference rolls with known difficult cases, I managed to produce a method that would reliably extract the film gate geometry from scans. At the heart of this method are a few observations about what film mask edges are, and about some properties they have:
- They are straight, and have long extents. This allows for discrimination from image content, and also guards against false detection caused by sprocket holes.
- They are directional. We know the outer areas are the film edge and should be darker, and that the inner area should be lighter and carry the image content.1
- The geometry of the film mask remains constant across each roll, because each frame is shot with the same physical film gate, meaning roll level consensus is the correct approach, enabling detections for film mask edges where it is impossible from the image alone.
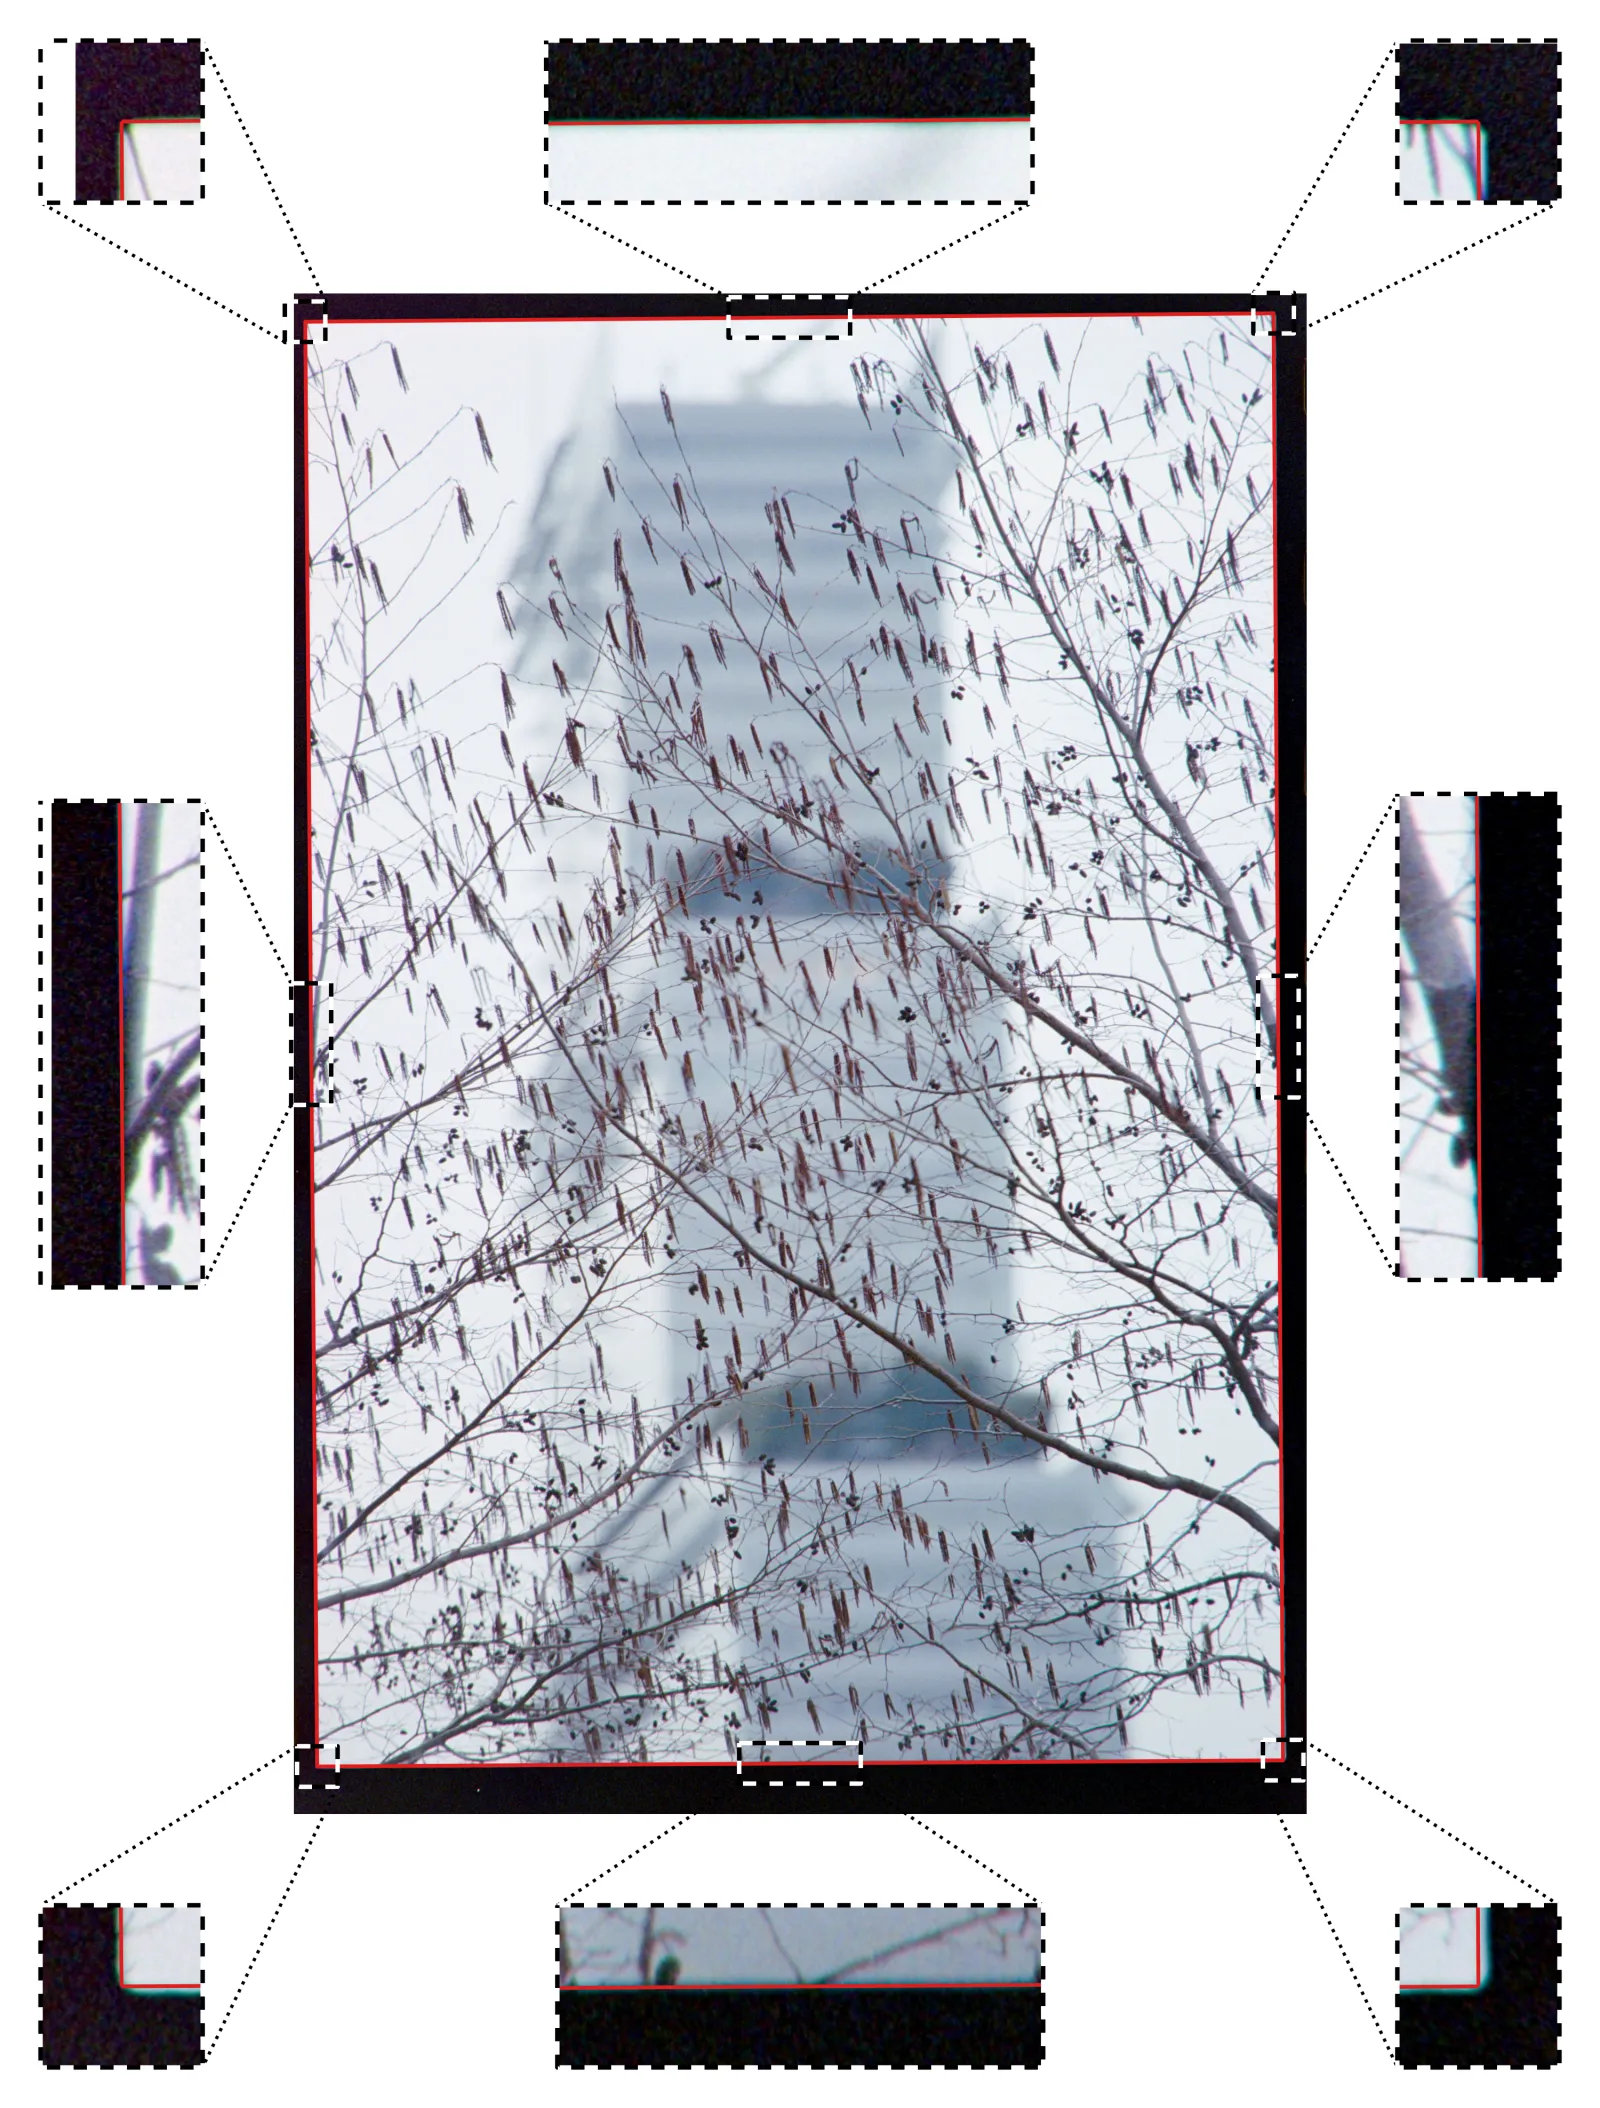
The final implementation leverages all these three properties, and is a bit more complicated than a simple edge detection. It involves pre-processing, a multistep method together with a bespoke edge detection algorithm, plus a robust outlier exclusion scheme to identify trustworthy crops at the roll level and propagate the geometry derived from them to the frames featuring either no detected edges or low scoring ones. As an illustration, here's the precision one can get on a clean file, within a few pixels, and a pretty aggressive zoom has to be applied for misalignments to become perceptible:
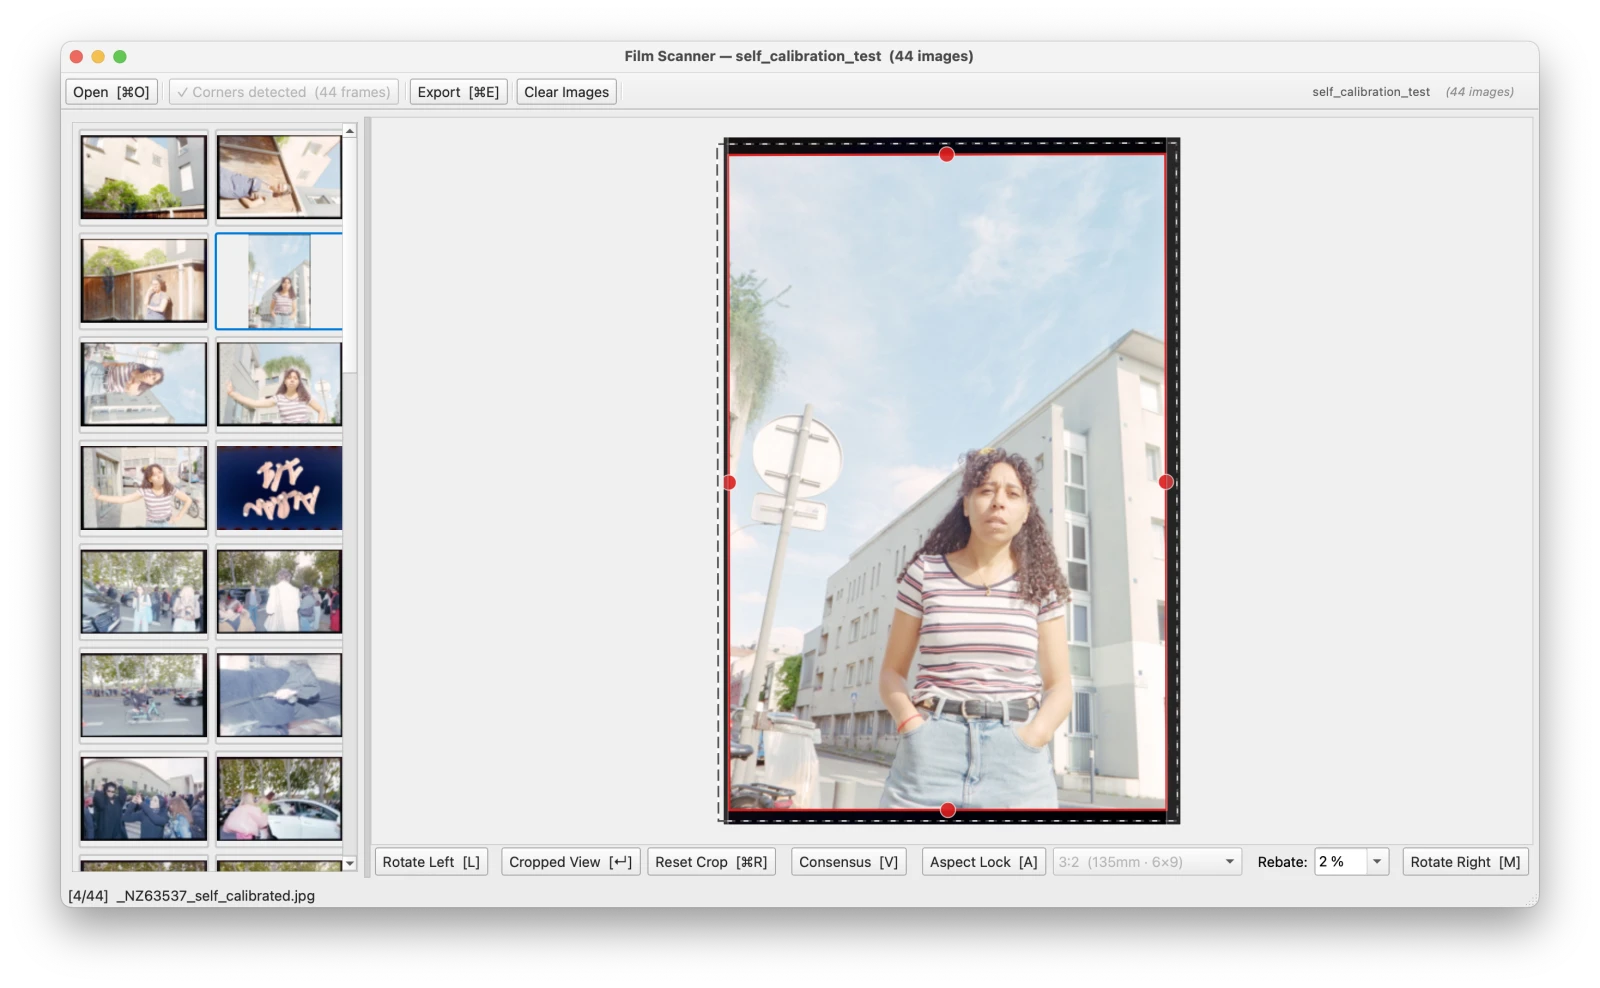
The final product works. It has cut down our processing times for the lab significantly, by around half for the part that happens behind the computer, and manual trimming is seldom required. I also built a GUI tool around the mask edge detection routine with file I/O, rotation (fine and in 90° increments), manual adjustment of the crop, selection of the film rebate margin and selective exclusion of specific frames, that brings interactivity and turned this solution into a workable product:
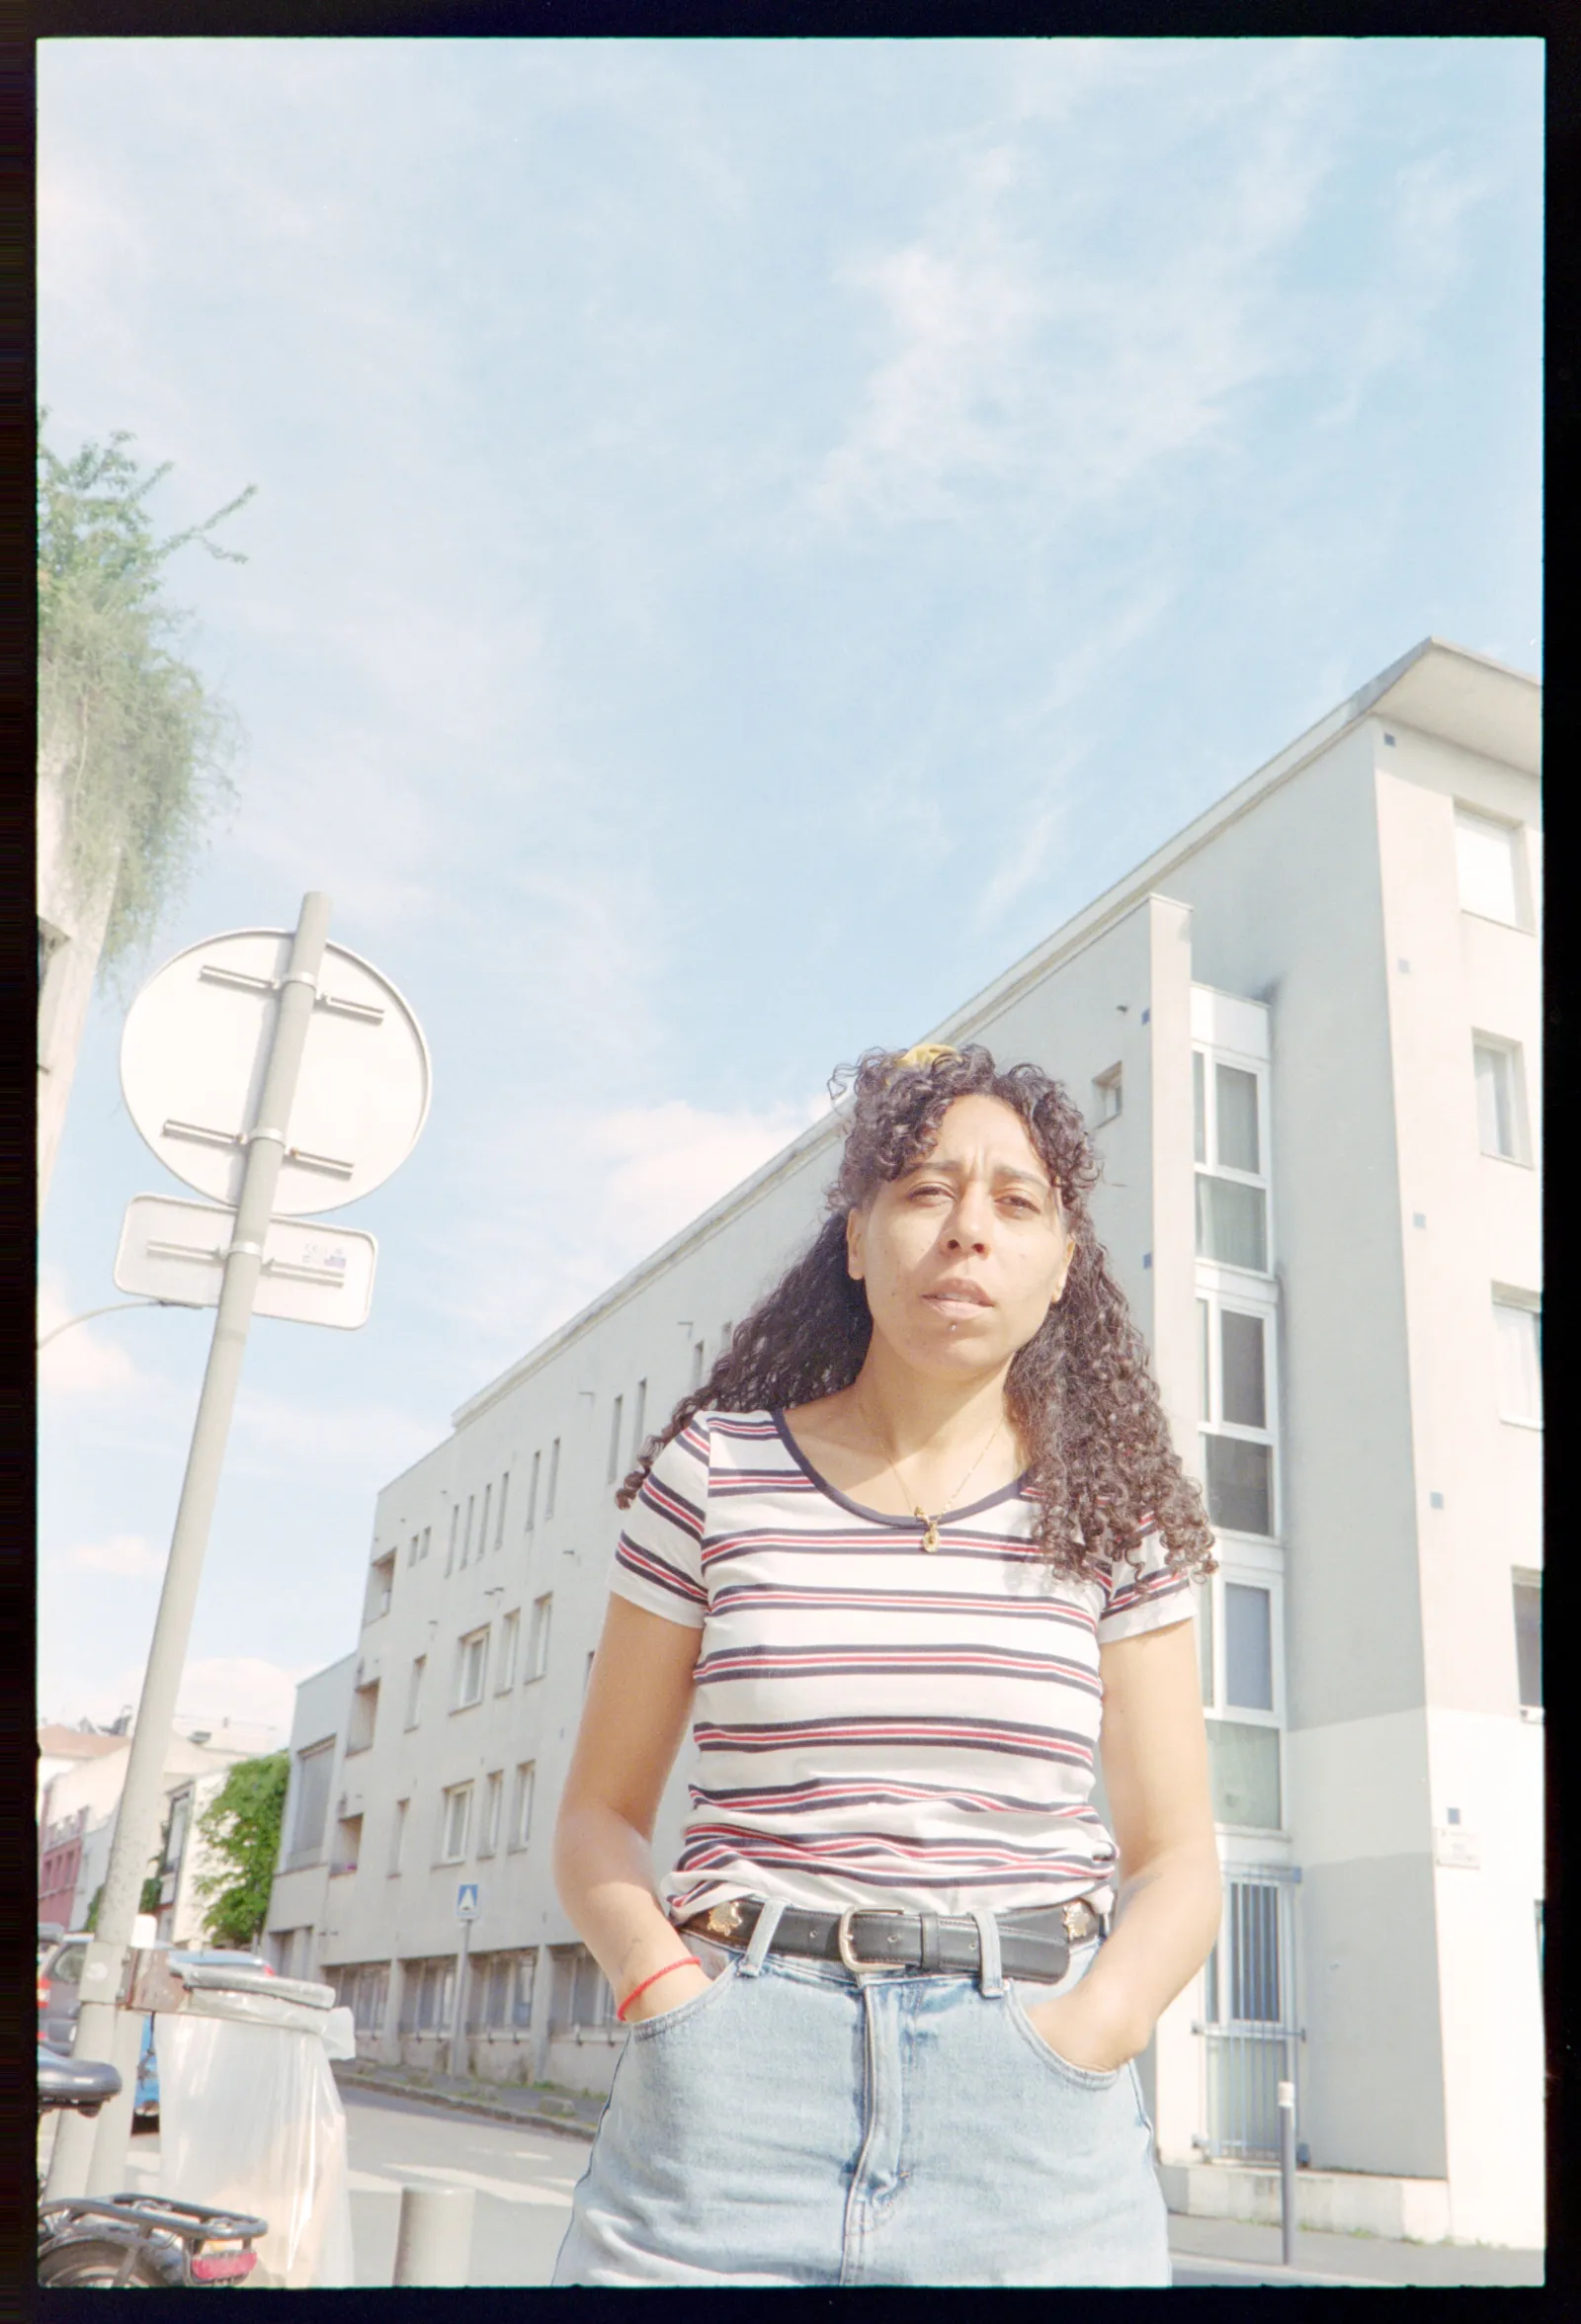
The detection accuracy is even good enough that I could implement something I haven't seen in any other software: automated rebate inclusion, showing off the mask edge on the image. For most frames, this is better than anything I could achieve by hand short of measuring the size of the border using a digital ruler and painstakingly adjusting:
My hope for film scanning workflows is that this method or one like it can be implemented in negative inversion software. It is a massive time saver for anyone who has to do a lot of rotating and dragging a rectangle over an obviously rectangular area in a digital image in general.
I also believe it may make camera scanning more viable for large volumes. This is critical since the Fuji Frontier or Noritsu scanners have long been discontinued, and almost every commercial lab has to rely on the shrinking fleet accessible via the used market, or slow camera scanning. With effective autocropping and solid colour science, camera scanning can become practical at scale, and a real alternative to the expensive and increasingly unreliable legacy equipment, making it easier for new entrants to get into film processing as the demand for it increases.
On the colour science front at least, we are seeing more and more tools emerge that handle inversion, as knowledge of the necessary operations to recover scene values from negative densities spreads to more people. In fact, the images shown here have been inverted using a script I wrote, with no per image tuning whatsoever.2 The trick is performing the removal of the mask and balancing of the channels in density space, with values determined according to film stock, and a white balance pass in ACES or an equivalent wide gamut linear colour space.
This writeup exists so that you know this is a tractable problem, and that automated cropping that works more often than most of the time is possible. If your organisation needs to solve this problem in particular, or one that looks like this in film or print scanning, I am reachable via the "contact" form on this website.
Footnotes
-
This is the case at least for inverted scans. My tool sits downstream of negative inversion because I haven't gotten to the point of integrating my own colour inversion pipeline, but adapting it to look for a transition from Dmin to the density of the image content in the negative is essentially a sign flip in the code. ↩
-
I needed showable images and the ones I could use with no crop or inversion already applied were from a test roll. The colours may look a bit washed out, this is because the preview has a gamma curve applied and has to deal with a lot of potential dynamic range. The point of this inversion pipeline is to produce scans that are as editable as digital raws. ↩